

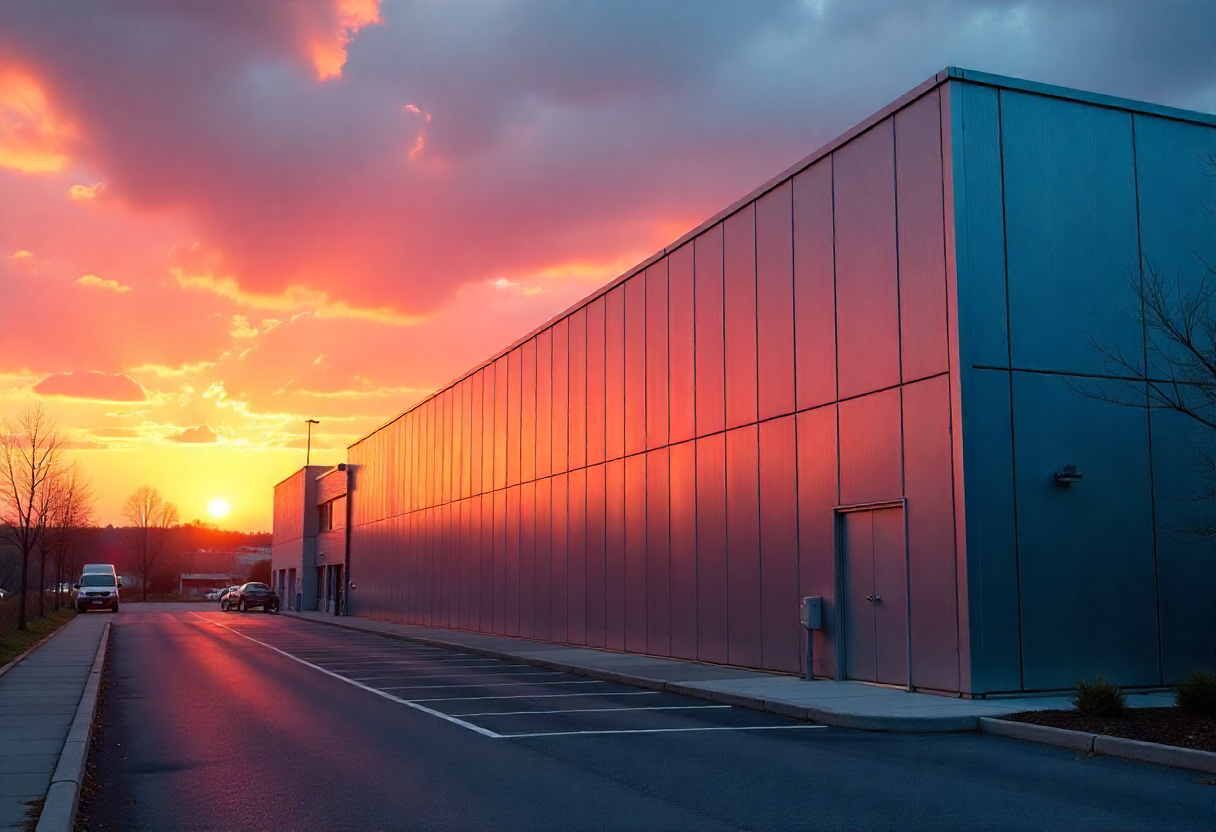
How to Install Foam Board Insulation in Metal Building: A Complete Guide
How to Install Foam Board Insulation in Metal Building: A Complete Guide
Learning to install foam board insulation in metal building structures can help you save money and improve energy efficiency. This guide walks you through each step of the process, from gathering materials to completing the final touches. The process requires careful measuring, precise cutting, and proper sealing to create an effective thermal barrier. Many building owners choose this type of insulation for its excellent performance and durability. This project becomes manageable when you work with top-rated metal construction services.
Materials Needed
You'll need specific materials to complete this project successfully. Start by purchasing foam boards that match your wall dimensions - measure carefully to avoid waste. Get high-quality construction adhesive designed for foam materials to ensure strong bonding to metal surfaces. Buy foil tape to seal joints and prevent air leaks between panels. A sharp utility knife will help you make clean, straight cuts through the foam material. Don't forget safety gear, including gloves and safety glasses, to protect yourself during the work. A tape measure and straight edge will help you achieve accurate measurements and cuts.
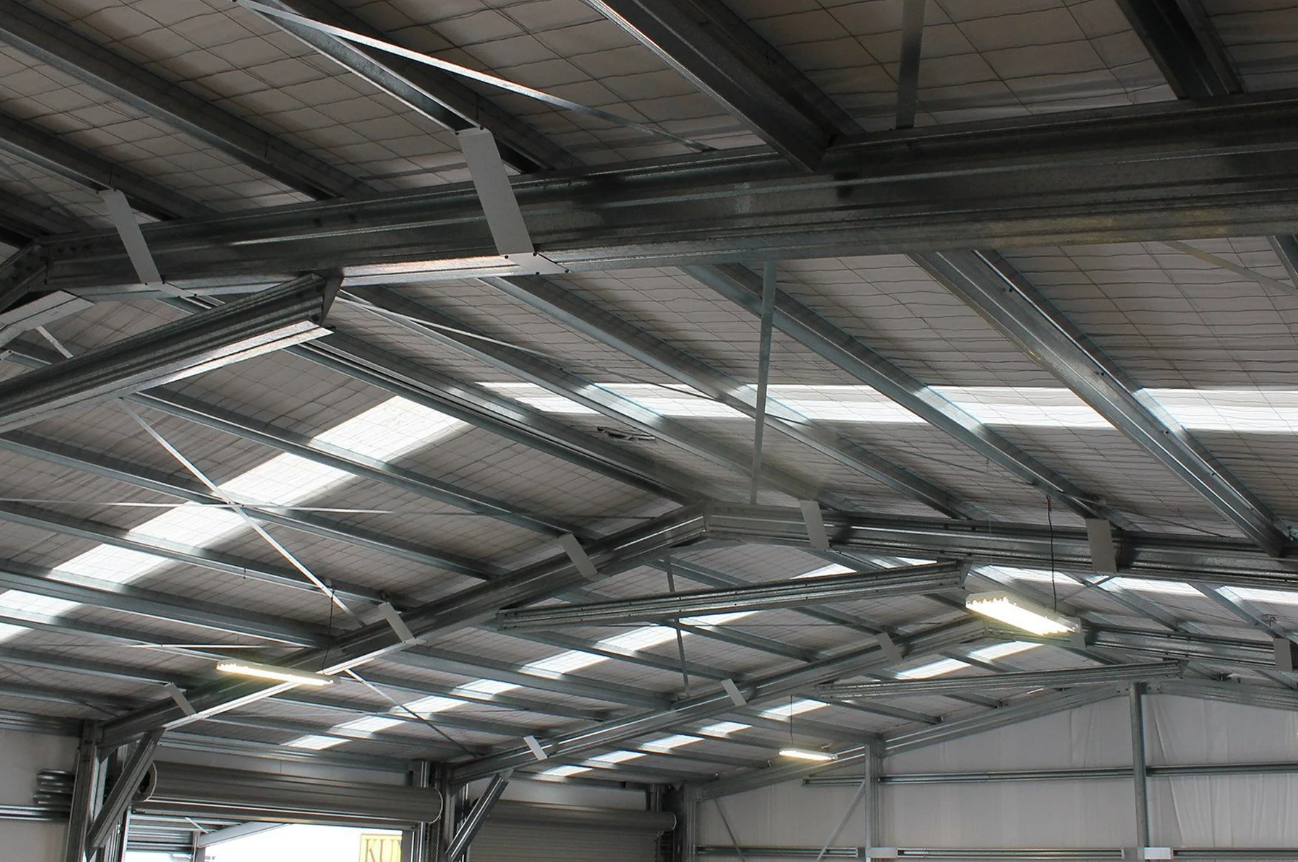
Preparing the Metal Building
Clean preparation makes the difference between good and great results. Remove old insulation, dirt, and any rust from the metal surfaces where you'll attach the foam boards. Check the entire area for damage or holes that need fixing before you start. Look for gaps where air might sneak through later. A clean, smooth surface helps the adhesive stick properly and creates a better seal.
Measuring and Cutting Insulation
Accurate measurements prevent waste and gaps in your insulation. Measure each wall or roof section separately since dimensions can vary. Mark your measurements on the foam boards with a pencil and straight edge. Cut the boards about 1/8 inch smaller than your measurements so they fit snugly without forcing. Use a sharp utility knife and score the foam several times before breaking it for clean edges.
Installing the Foam Board Insulation
Start placing your foam boards from one corner and work your way across each section. Press each piece firmly against the metal surface and check that it sits flat. Apply construction adhesive to the back of each board before positioning it. For extra security in windy areas, add screws with large washers every 12-16 inches. Make sure boards touch each other tightly to prevent gaps that let heat escape.
Sealing and Securing Insulation Panels
Good sealing turns your insulation from decent to excellent. Run foil tape along all seams between boards, pressing it down firmly to create an airtight seal. Check that all screws are tight and haven't pulled through the foam. Use caulk or expanding foam to fill any small gaps around edges or corners. Pay special attention to areas around windows, doors, and other openings where air leaks happen most often.
Finishing Touches and Tips
These final steps make your insulation system complete and long-lasting:
Seal all joints and edges with quality tape to stop air leaks.
Double-check that all screws hold the insulation firmly in place.
Add a vapor barrier to control moisture and prevent water damage.
Fix any gaps or loose spots you find right away.
Consider extra insulation layers in very hot or cold climates.
Taking care of these details helps your foam board insulation work better and last longer. A well-installed system keeps your metal building comfortable while cutting energy bills. Regular checks after installation catch small problems before they become big ones.
Related Topics:

How to Install Insulation in a Metal Building: A Beginner's Guide to the Process
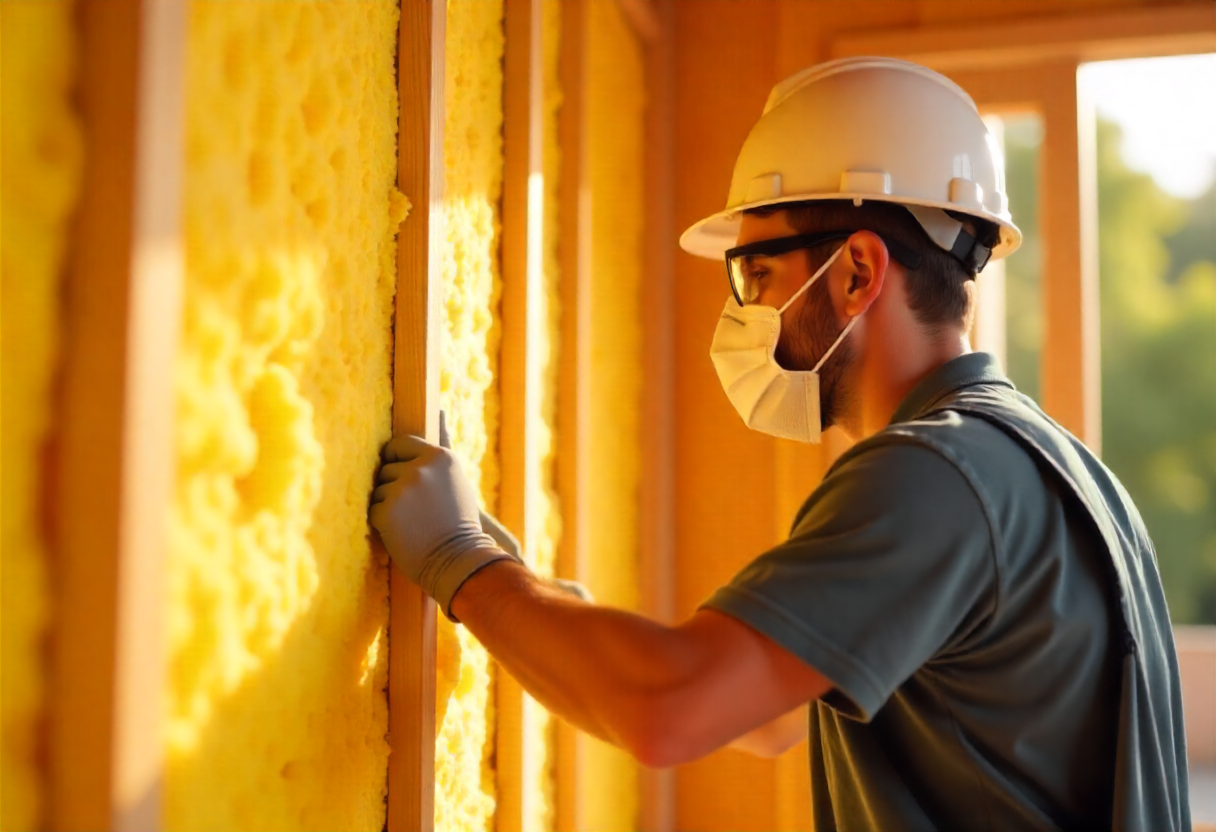
How to Install Insulation in a Metal Building: A Beginner's Guide to the Process
Learning to install insulation in a metal building can save you money and improve energy efficiency year-round. This guide walks you through each step of the process, from choosing materials to checking your work when finished. Metal buildings need proper insulation to control temperature and prevent moisture problems. Experienced Dallas-Fort Worth metal builders recommend following these steps carefully for the best results. With the right approach, you can create a comfortable space that stays warm in winter and cool in summer.
Understanding Insulation Materials
Different insulation materials work better for different situations in metal buildings. Fiberglass batts are popular because they cost less and provide good heat protection. These come in pre-cut sizes that fit easily between metal frames. Rigid foam boards offer high insulation values and resist moisture well. Spray foam effectively fills gaps and cracks, but it is more expensive to install. Reflective foil insulation bounces heat away and works great in hot climates. Mineral wool resists fire and reduces noise, too. Cellulose insulation uses recycled paper and provides good thermal protection. Choose the material that fits your budget and climate needs.
Measuring and Planning Insulation
Accurate measurements make the difference between a successful project and a frustrating one. Start by measuring all walls, ceilings, and other surfaces you plan to insulate. Write down these measurements and sketch a simple layout of your building. Factor in the thickness of your chosen insulation material when calculating how much you need. Think about obstacles like electrical boxes, pipes, or support beams that might require special cuts. Plan your installation order - typically, you'll work from top to bottom. Buy about 10% extra material to account for waste and mistakes. Having a clear plan saves time and money during installation.
Preparing the Metal Building
Clean all surfaces before installing insulation. Remove dirt, rust, and loose paint that could prevent proper adhesion. Check for holes or cracks in the metal walls and roof, then seal them with appropriate caulk or tape. Look for areas where moisture might enter the building and address these problems first. Apply a vapor barrier if your climate requires one - this plastic sheeting controls moisture and prevents condensation inside walls. Fix any structural problems before moving forward. A well-prepared building provides a solid foundation for your insulation project.
Installing Insulation Sheets or Rolls
Start by cutting your insulation material to fit each section. Use a sharp utility knife for clean cuts and measure twice before cutting. Place the insulation against the metal surface, making sure it fits snugly without compression. Secure the material with screws and large washers designed for metal buildings - these hold the insulation flat against the surface. Work systematically across the building, checking each piece for proper fit. Avoid leaving gaps between pieces, as these create thermal bridges that reduce efficiency. When installing between metal studs, the insulation should fill the entire space without being stuffed too tightly.
Sealing Gaps and Air Leaks
Find and seal every gap to make your insulation work properly. Focus on these common problem areas:
Door and Window Frames: Check around all openings for spaces that let air through.
Joints and Seams: Seal where metal panels connect to stop air movement.
Electrical and Plumbing Penetrations: Close holes around wires and pipes completely.
Roof and Wall Junctions: Pay special attention where the roof meets walls, as these spots often leak air.
Use quality caulk or expanding foam for smaller gaps. Larger openings might need metal patches or additional insulation pieces.
Evaluating Insulation Effectiveness
Test your work to make sure the insulation performs as expected. A thermal camera shows hot and cold spots that indicate problems, but you can also use your hands to feel for temperature differences along walls and ceilings. Look for any sagging, gaps, or compressed areas in the insulation material. Check that all fasteners are tight and the material stays in place. A simple way to test air sealing is to hold a lit incense stick near potential leak points on a windy day - smoke movement shows air flow. If you find problems, fix them right away. Good insulation should keep your building comfortable while reducing energy bills
Related Topics:

How to Cool a Metal Building: Effective Cooling Solutions
How to Cool a Metal Building: Effective Cooling Solutions
Metal buildings present unique cooling challenges that necessitate intelligent solutions and meticulous planning. High temperatures inside these structures can make them uncomfortable and reduce productivity. Having reliable metal building contractors helps ensure you get the right cooling system for your specific needs. This guide covers the most effective methods to keep metal buildings comfortable during hot weather. These proven techniques will help you create a cooler environment while managing energy costs.
Insulation
Good insulation is the first step to cooling a metal building and controlling indoor temperatures year-round. Proper insulation prevents heat from transferring through walls and roofing, keeping hot air out during the summer. Use materials with high R-values, like spray foam or rigid foam boards, for the best results. Make sure installation covers all areas without gaps or compressed spots that reduce effectiveness. Reflective insulation works well in sunny areas by bouncing heat away from the building. Quality insulation creates a protective barrier that enhances the effectiveness of other cooling methods and reduces energy costs over time.
Ventilation
Good airflow helps regulate temperature and prevents heat buildup inside metal buildings. Natural ventilation through windows, louvers, or ridge vents can move air without using electricity. Powered options like exhaust fans or turbine vents work better for larger buildings that need more air movement. Plan your ventilation system based on building size, layout, and where you place intake and exhaust vents. Proper ventilation also improves air quality by reducing moisture and removing stale air. Smart ventilation design can cool a metal building effectively while keeping operating costs low.
Air Conditioning
Air conditioning systems provide reliable temperature control for metal buildings in hot climates. These units remove heat from indoor air and move it outside, creating a comfortable environment. Choose the right system size based on your building's square footage, insulation quality, and layout. Proper installation and regular maintenance keep your AC running efficiently and lasting longer. Programmable thermostats and zone controls let you cool different areas as needed, saving energy and money. Well-designed AC systems can handle the unique challenges of cooling large metal spaces.
Fans
Fans improve air circulation and help distribute cool air throughout metal buildings. Ceiling fans create gentle breezes that make people feel cooler even at higher temperatures. Exhaust fans quickly remove hot air and moisture from the building. Position fans carefully to avoid dead spots where air doesn't move well. Choose fans based on room size, airflow rating, and energy efficiency. Oscillating fans can target specific work areas that need extra cooling. Strategic fan placement complements other cooling methods to create a comfortable environment.
Cool Roofing
Cool roofing materials reflect sunlight and release heat, reducing the temperature inside metal buildings. These special materials bounce back much of the sun's energy instead of absorbing it. Here are important features to look for:
Reflectivity: Choose materials that reflect most sunlight away from your building
Heat Release: Pick materials that give off absorbed heat quickly and efficiently
Insulation: Add insulation under cool roofing for better heat control
Maintenance: Check and maintain your cool roof regularly to keep it working well
Shading Solutions
External shading blocks sunlight before it hits your building, reducing heat gain significantly. Awnings, louvers, and solar screens can cut direct sun exposure on windows and walls—plant trees or shrubs around your building to create natural shade and cooling. Inside shading, like blinds, curtains, or window films, also helps control heat. Reflective window coatings bounce sunlight away while still letting in light. Combining different shading methods yields better results than using a single approach.
Related Topics:

How to Install Fiberglass Insulation in a Metal Building: A Step-by-Step Guide
man-installing-fiberglass-insulation
This guide provides clear instructions for insulating your metal structure with fiberglass material. Working with a trusted metal building contractor can help, but many property owners choose to handle this project themselves. The process involves preparing surfaces, measuring materials, cutting insulation to size, and securing everything properly. Understanding each step helps you complete the job safely and effectively. Following proper techniques yields better energy savings and increased comfort for your building.
Materials Needed
To Install Fiberglass Insulation properly, you need several basic materials and tools. Gather fiberglass batts sized for your wall and ceiling spaces, plus a sharp utility knife for cutting. Safety gear includes protective glasses, work gloves, and a dust mask to prevent breathing fiberglass particles. You'll also need a staple gun to attach the insulation securely. Having wire supports helps hold the ceiling insulation in place during installation. Collect all materials before starting to make the job go smoothly and prevent delays.
Preparing the Metal Building
Clean out your building before starting any insulation work. Remove debris, tools, and anything else that might get in your way. Look for gaps, holes, or cracks in the walls and ceiling that need sealing first. Check for sharp edges or metal pieces sticking out that could tear the insulation. Make sure electrical wires and fixtures are secure and won't interfere with your work. Taking time to prepare properly makes installation much easier and helps avoid problems later.
Measuring and Cutting Insulation
Measure each wall and ceiling section carefully before cutting any insulation. Use a tape measure to get exact length and width measurements. Mark spots where you'll need to cut around things like outlets, beams, or windows. Cut the insulation with a sharp utility knife, making clean, straight cuts without squashing the material too much. For curved walls or corners, measure twice and cut once to avoid waste. Good measuring and cutting means the insulation fits perfectly without gaps.
Installing the Fiberglass Insulation
Place the cut insulation pieces against the walls, making sure they fit snugly without gaps. Use your staple gun to attach the insulation to the metal frame, spacing staples evenly for a secure hold. For ceiling installation, you might need wire supports to hold the insulation up while you staple it in place. Cut carefully around pipes, wires, and other obstacles so the insulation fits tightly around them. Work systematically from one end of the building to the other to stay organized and avoid missing spots.
Sealing and Securing Insulation
Check your installation for any gaps or loose areas that need attention. Use foil tape or caulk to seal edges and joints where pieces of insulation meet. Add wire supports or metal bands if needed to prevent the insulation from sagging or shifting over time. Make sure all insulation sits flush against the walls and ceiling without air pockets. Install a vapor barrier over the insulation using adhesive or staples for extra protection against moisture.
Finishing Touches
Complete your installation with these important final steps:
Trimming Excess Insulation: Cut away any insulation that sticks out beyond the frame or looks uneven.
Sealing Gaps: Fill small openings with caulk or spray foam to stop air leaks and improve performance.
Checking for Compression: Make sure no insulation is packed too tightly, which reduces how well it works.
Securing Insulation: Add extra fasteners or tape where needed to keep everything in place.
Inspecting the Entire Installation: Walk through the whole building to spot and fix any issues or missed areas.
The finished installation should look neat and professional, with no visible gaps or loose material. Properly installed fiberglass insulation will keep your metal building comfortable in all weather conditions while reducing energy costs for years to come.
Related Topics:

How to Seal a Metal Building: Protect Your Investment With These Tips
Metal construction experts recommend proper sealing as the best way to protect your building investment from water damage and structural problems. This guide covers the main steps and techniques you need to know when planning to seal a metal building. You'll learn about the most vulnerable areas that need attention, how to choose the right materials, and the correct application methods. We'll also share maintenance tips to keep your sealing work effective for years to come. Following these proven methods will help you avoid costly repairs and extend the lifespan of your building.
Importance of Metal Building Sealing
Learning how to seal a metal building properly prevents water from getting inside, which causes rust, corrosion, and serious structural damage. Water infiltration is the biggest threat to metal buildings, making proper sealing your first line of defense. Check all joints, seams, and connections carefully, starting with the roof areas like ridge caps and eaves. Look for any gaps or holes and fill them with quality sealant made for metal surfaces. Pay special attention to areas around windows, doors, vents, and pipes where water commonly enters. Don't forget to inspect the foundation for cracks that might let water seep in from below.
Common Areas for Sealing
Inspecting a metal building for areas that require sealing requires a thorough examination of key joints and connections. Roof seams where metal panels connect often develop gaps from expansion and contraction. Window and door frames can develop leaks over time if not properly sealed. Openings for vents, pipes, and electrical wiring require careful attention to prevent water from entering. Connections between walls and the roof, as well as transitions between different building materials, often require sealing work. Regular checks of these common problem areas help maintain your building's protection against water damage.
Choosing the Right Sealant
Picking the right sealant for your metal building depends on several key factors that affect performance and longevity. First, make sure the sealant works with your specific metal type to avoid chemical reactions. The application method should match your building's design—some jobs need simple caulk gun application, while others require special techniques. Weather conditions, such as temperature swings, sun exposure, and moisture levels, matter when selecting a sealant that will hold up over time.
Proper Preparation Steps
Clean the metal building surface completely before applying any sealant to remove dirt, dust, grease, or other materials that could prevent proper bonding. Power wash the surface first to remove loose debris and dirt. Use a mild detergent or cleaner made for metal surfaces to scrub away tough stains or residue. Rinse everything thoroughly to remove all cleaning products. Let the metal building dry completely before starting the sealing work. Check the surface again for any remaining dirt or particles, since even small pieces can reduce how well the sealant sticks.
Applying Sealant Techniques
Follow the manufacturer's directions carefully for the specific sealant you're using on your metal building. Clean the surface thoroughly first to remove dirt, rust, or debris. Apply the sealant with a caulking gun or brush, depending on the sealant type and area you're treating. Make sure to apply an even layer that covers all seams, joints, and gaps. Pay extra attention to areas where water typically gets in, like around windows, doors, and vents. Let the sealant cure for the recommended time to achieve proper bonding and effectiveness. Check sealed areas regularly for wear or damage, and reapply sealant as needed to maintain your building's protection.
Maintenance Practices
Maintaining the sealant on your metal building requires regular care to ensure long-lasting protection from weather and environmental damage. Here are the key practices to follow:
Regular Inspections: Check routinely for signs of wear, gaps, or damage in the sealant application.
Cleaning Procedures: Set up a cleaning schedule to remove dirt, debris, and pollutants that can break down the sealant over time.
Reapplication Timelines: Plan for periodic touch-ups of sealant as recommended by the manufacturer or based on your building's exposure to tough conditions.
Following these maintenance practices will extend the lifespan of the sealant and keep your metal building protected.
Related Topics:
How to Install Double Bubble Insulation in a Metal Building: A DIY Guide
Installing double bubble insulation in your metal building is a smart way to control temperature and save energy. This guide walks you through each step of the process, from getting your materials ready to finishing touches. You'll learn what tools you need, how to prep your building, and the right way to install and seal the insulation. When done correctly, this project can make your space more comfortable year-round. Follow these steps to work with the best metal construction company practices.

Materials and Tools Needed
You'll need specific tools and materials for this job. Here's what to gather before starting: double bubble insulation rolls, reflective foil tape, utility knife, straight ruler, safety gloves, safety glasses, and a staple gun with staples. Pick insulation with a good R-value for better heat protection. The foil tape seals seams and keeps the system working well. Use the utility knife and ruler to cut insulation to the right size for your building. Safety gear protects you from cuts and eye injuries during work. The staple gun holds everything in place securely.
Preparing the Metal Building
Get your building ready before installing insulation. Clean surfaces help the insulation stick properly and last longer.
Remove Debris: Sweep or vacuum all dust, dirt, and debris from walls and ceiling areas.
Wipe Down Surfaces: Clean all surfaces with a damp cloth and mild soap to remove grease, oil, and dirt.
Allow Drying Time: Let surfaces dry completely before starting installation to avoid moisture problems that can hurt insulation performance.
Installing the Double Bubble Insulation
Check that all nails and screws are flush with the surface for smooth installation. Measure how much insulation you need for each section. Unroll the double bubble insulation carefully, making sure it fits tightly between the metal frame pieces. Use your staple gun or special insulation glue to hold it in place. Overlap the edges where pieces meet to prevent air from entering. Work slowly and keep the material flat without wrinkles or folds that create air pockets. Good installation makes your building more energy efficient and keeps temperatures steady.
Securing and Sealing the Insulation
Proper attachment and sealing make your insulation work at its best for temperature control and energy savings. Follow these key steps:
Secure the Insulation: Use screws or staples to attach insulation firmly to the building frame, ensuring no loose spots or gaps.
Seal the Seams: Put aluminum foil tape over all seams and joints to create a solid barrier against air leaks and heat transfer.
Insulate Around Openings: Pay extra attention to areas around doors, windows, and other openings, using foam strips or extra insulation to stop heat loss.
Final Steps and Tips
Do a complete check of your work to make sure everything is installed correctly. Look at all seams and make sure foil tape covers them completely to stop air leaks. Check that the insulation fits snugly and covers all surfaces without gaps or wrinkles. Look closely at corners and edges where insulation might come loose. Find any tears or holes that could hurt performance and fix them. Clean up your work area by removing all tools and debris. These final steps ensure your double bubble insulation works properly and gives your metal building the best heat protection.
Related Topics:

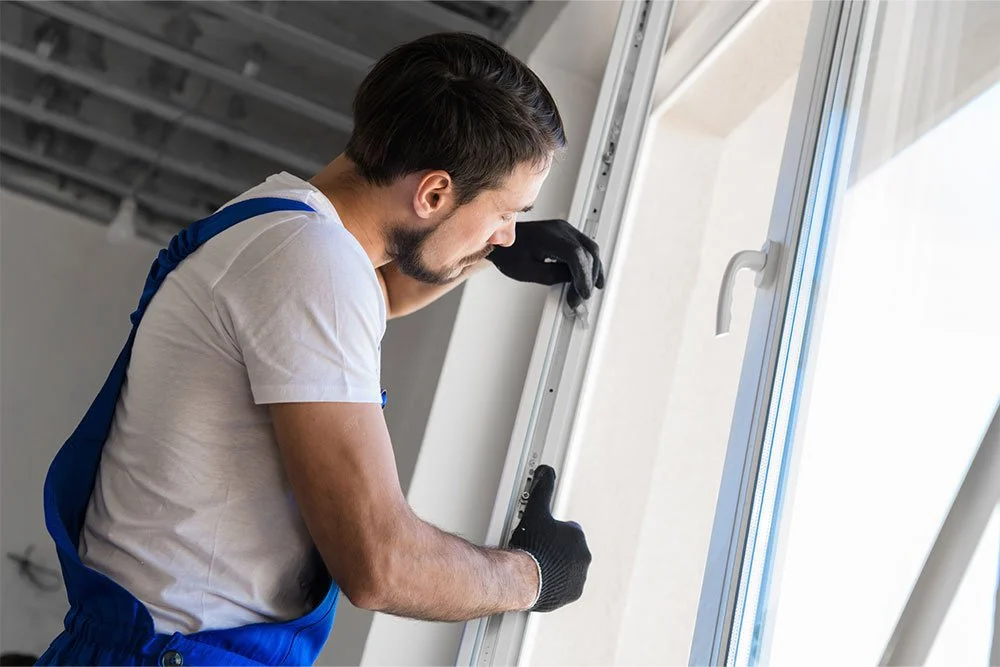
How to Install Windows in a Metal Building: DIY Tips and Tricks
Installing windows in a metal building requires careful planning and the right approach. This guide walks you through each step of the process from start to finish. You'll learn about the tools needed, how to measure properly, and the best techniques for a clean installation. Steel construction projects like this need attention to detail for the best results. We'll cover everything from preparing the opening to sealing for energy savings.
Necessary Tools and Materials
You need several basic tools and materials for this job. Get a measuring tape, level, drill with bits, screws, screwdriver, caulk gun, and safety glasses. The measuring tape helps you place windows correctly. A level keeps everything straight and balanced during setup. Your drill and bits create holes for screws. Pick the right screws and use a good screwdriver to attach the windows securely to the metal walls. A caulk gun seals gaps between the window frame and the building to stop leaks. Safety glasses protect your eyes while working. Having all these ready makes the job go smoothly.
Measuring and Marking Window Placement
Getting exact measurements is key to a good window installation. Start by measuring the width and height of where the window goes. Use your measuring tape carefully to get precise numbers. Mark the exact center of the opening both across and up and down. This center point helps you line up the window frame correctly. Measure and mark where the window edges will sit, making sure they're level and straight. Check all your measurements twice before moving on. Good measurements and clear marks help your window fit perfectly in the metal building.
Preparing the Window Opening
Getting the window opening ready takes careful work. First, check your measurements again and make sure they match the window frame size exactly. Mark the window outline on the metal building with chalk or another marking tool. Use a level to make sure the opening will be perfectly straight across and up-and-down. Cut through the metal carefully along your marked lines using tin snips or a saw. Take your time with this step - being precise here makes the rest of the job easier. A well-prepared opening means your window will fit right and look professional.
Installing the Window Frame
Place the window frame in the opening and check that it fits snugly against the metal building. Make sure the frame sits flat and level before securing it. Attach the frame using screws or bolts that work with your building type. Follow the window maker's instructions for your specific frame. Check that everything lines up properly before tightening all the way - this prevents the frame from getting twisted. Use your level to confirm the frame is straight and square. Test that the window opens and closes easily once it's in place. A properly installed frame makes your building look good and work well.
Sealing and Insulating for Efficiency
Good sealing and insulation keep your building comfortable and save energy. Here's what to do:
Put high-quality caulk around the window frame to seal gaps that let air through
Add weatherstripping around the window parts to create a tight seal when closed, stopping drafts and heat loss
Think about using low-e glass for better insulation - it reduces heat transfer while still letting light in
Related Topics:

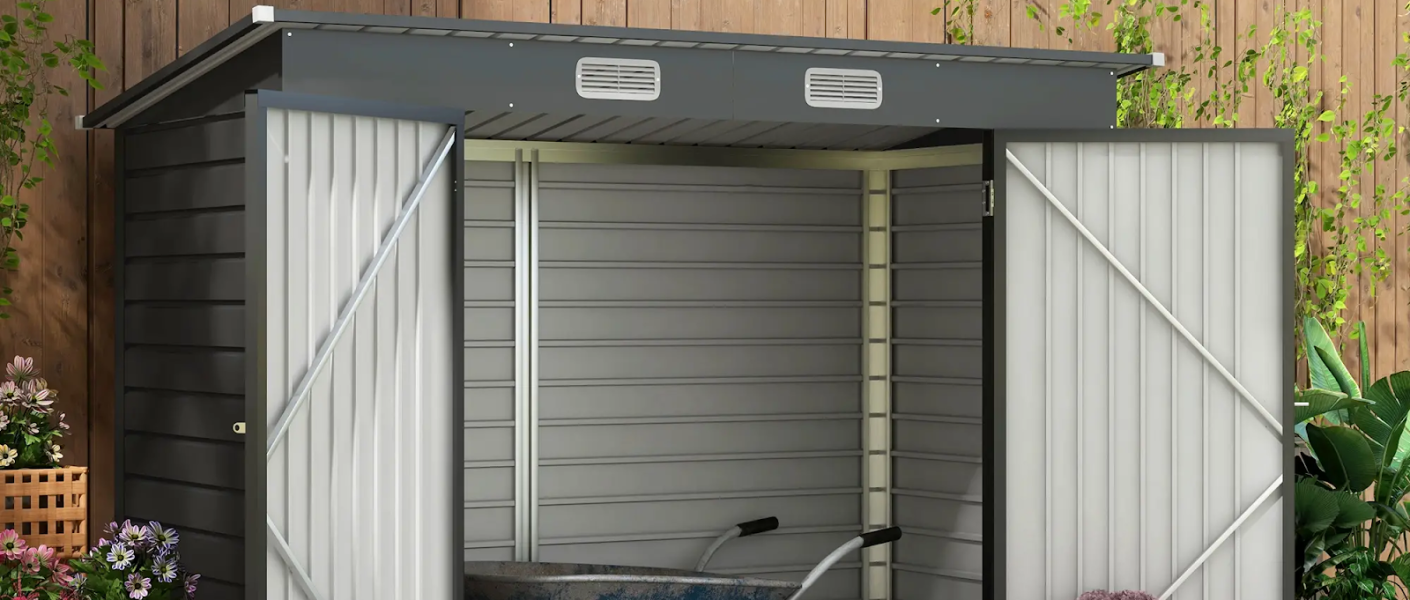
How to Move a Metal Shed: A Step-by-Step Guide
Moving a metal shed requires careful planning and the right approach to avoid damage. This guide walks you through each step of the process from start to finish. The best metal fabrication practices can help ensure your shed stays intact during the move. You'll learn how to take it apart safely, transport it properly, and put it back together at the new location. With the right preparation and tools, you can relocate your shed without any major problems.
Assess Shed Size and Weight
Start by measuring your shed carefully. Use a tape measure to get the exact length, width, and height. Check the weight by looking at the manufacturer's details or specs that came with your shed. This information helps you plan what equipment you need and how many people should help. Metal sheds have different weights depending on the thickness of the metal used. Write down these measurements so you can reference them during the move. Knowing the size and weight helps you decide if you need special equipment or extra helpers.
Gather Necessary Tools and Equipment
Get all your tools ready before you start taking the shed apart.
Tools:
Cordless drill with drill bits
Screwdrivers (Phillips and flathead)
Adjustable wrench
Equipment:
Work gloves
Safety goggles
Moving straps
A cordless drill makes removing screws much faster and easier. You'll need both types of screwdrivers for different screw heads. The adjustable wrench helps with nuts and bolts that might be tight. Always wear work gloves and safety goggles to protect yourself from sharp metal edges. Moving straps make it safer to lift and carry heavy pieces without hurting your back.
Disassemble Shed Components
Start taking apart your shed from the top down. Use your power drill to remove screws from the roof panels first. Take the panels off carefully and put them somewhere safe. Next, work on the side walls. Remove screws from one wall at a time, starting at one end. Pull each wall panel away from the frame slowly to make sure nothing is still connected. Take off the door by removing the hinges and any locks or handles. Put all screws and small parts in labeled containers to prevent loss. Keep everything organized as you work.
Prepare the Shed for Transport
Remove the floor panels to see the base structure underneath. Look at the base carefully for any loose or broken parts that need fixing before you move anything. Here are three important steps:
Tighten all loose screws, bolts, and nuts so nothing falls off during transport
Check that all walls are stable and add extra support to any weak areas
Put numbers or labels on all parts so you know how they fit together later
These steps prevent problems during the move and make reassembling everything much easier. Please take photos of how parts connect before you take them apart.
Reassemble the Shed in the New Location
Please set up your shed in its new spot by laying out all the parts in an organized way. Check that you have everything before you start building. Look at your instruction manual or the photos you took during disassembly. Start with the frame and make sure each piece connects securely. Add the walls, roof panels, and door in the right order. Use your tools to tighten all bolts and screws properly. Check that everything lines up correctly and feels solid. Test the door to make sure it opens and closes smoothly. Walk around the finished shed to make sure it looks right and feels sturdy.
Related Topics:

How to Build a Metal Carport: What You Need to Know
Building a metal carport requires careful planning and preparation to ensure success. Leading metal building contractors in Dallas recommend focusing on key steps, including location selection, size planning, tool preparation, ground work, and proper assembly. This guide walks you through each step to help you complete your carport project safely and efficiently. You'll learn what to consider when picking the right spot and how to prepare your site properly. Following these steps will help you build a sturdy carport that lasts for years.

Selecting the Right Location
Pick the best spot for your metal carport by considering sunlight, ground slope, and proximity to your home or driveway. Good sunlight helps prevent moisture buildup and rust on your carport. Make sure the ground slopes enough for water to drain away and not pool around the structure. Putting the carport near your home or driveway makes it easier to use and more secure. Look at the area around your property to find the best location. Check these factors carefully so your carport works well and lasts long while fitting nicely with your property.
Choosing the Appropriate Size
Figure out the right size for your metal carport by measuring the vehicles or equipment it will protect. Measure the length, width, and height of your largest vehicle or equipment. Add extra space around the edges so you can easily get in and out. Think about future purchases or storage needs to avoid the need for expansion later. Remember to include accessories like roof racks or toolboxes that might need more height or width. Check these factors carefully to make sure your metal carport fits your current and future needs.
Gathering Necessary Tools and Materials
Get ready to build your metal carport by collecting the right tools and materials for construction.
1. Tools:
Drill with screwdriver bits
Wrench set
Level
Tape measure
2. Materials:
Metal carport kit
Concrete mix
Gravel or crushed stone
Anchors or concrete bolts
Check that all tools work properly and materials are of good quality for a strong structure. Accurate measurements are key to building successfully, so double-check sizes before starting. Set up your work area neatly to make construction easier. Good preparation will help you assemble your metal carport smoothly.
Preparing the Groundwork
Start preparing the ground by clearing the area and making sure it's level and clean. Remove plants, rocks, and other items from the site. Use a shovel, rake, and level to smooth the ground and fix uneven spots. Check that the area matches the size of your carport. Use stakes and string to mark the boundaries correctly. Make sure water can drain properly so it doesn't collect under the carport. Pack down the soil to create a stable base for your carport. Good ground preparation is important for making your metal carport strong and long-lasting.
Assembling and Installing the Carport
Start by unpacking all parts and organizing them following the maker's instructions. Once everything is sorted, follow these steps for easy installation:
Lay Out the Foundation: Place the base rails according to the layout plan, making sure they are square and level.
Assemble the Frame: Connect the pre-drilled frame parts using the included hardware and tighten them securely.
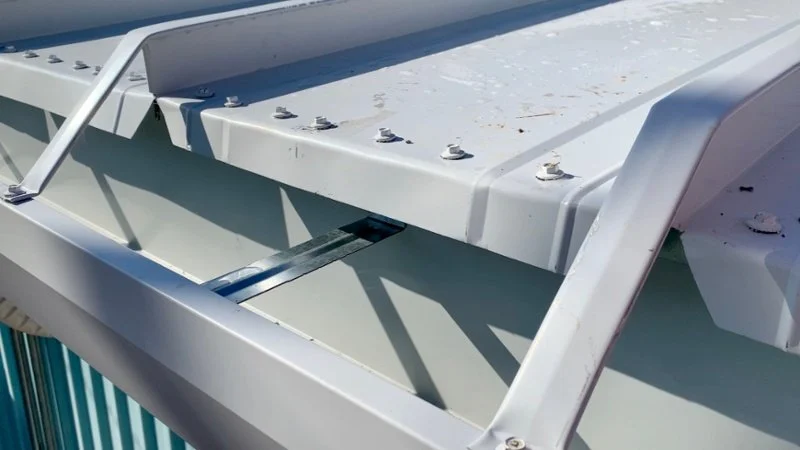
Attach Roof Panels: Install roof panels starting from one end, overlapping each panel to stop leaks.
Secure and Check Stability: Anchor the carport firmly to the ground, and check all connections for stability before finishing.
Related Topics:
How to Frame a Metal Building: A Complete Beginner's Guide
Working with a skilled metal contractor makes framing a metal building much easier for beginners. This guide walks you through the basic steps of building a metal structure from start to finish. You'll learn about the main parts, how to prepare your site, and the proper way to assemble everything. We'll cover foundation work, frame assembly, panel installation, and final touches. These simple steps help you understand what goes into creating a strong, long-lasting metal building.

Understanding Metal Building Components
Metal buildings have several key parts that work together. The main frame uses rigid steel pieces that hold up the entire structure and keep it stable. Roof and wall panels act like the building's skin, keeping out rain, wind, and weather. Support pieces called girts and purlins make the frame stronger and hold up the panels. Insulation helps control temperature inside and saves energy costs. You'll also need doors, windows, and trim pieces to complete the building. Knowing these basic parts helps you understand how everything fits together to make a solid structure.
Site Preparation and Foundation
Getting your site ready is the first real step in building. Clear away all grass, rocks, trash, and dirt from the area where the building will be constructed. Make sure water can drain away from the building area to prevent flooding problems later. The foundation is the most important part because it holds up everything else. Use a concrete slab, concrete piers, or footings, depending on your soil and building size. Pack down the soil firmly and add a moisture barrier to stop water from getting under the foundation. This prevents the foundation from shifting or cracking over time.
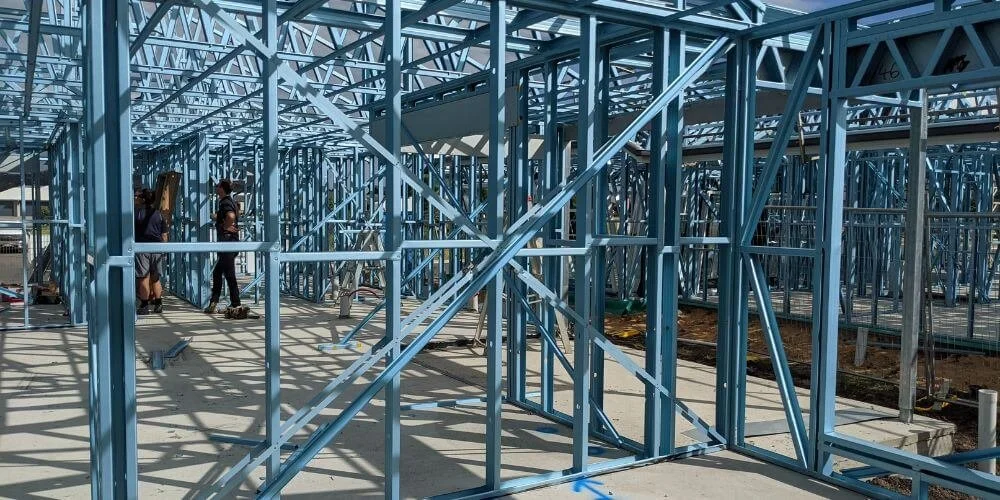
Erecting the Metal Building Frame
Building the frame requires careful measuring and strong connections. Start by putting up the main support columns and bolting them tightly to the foundation. Then attach the roof beams to these columns, making sure they're straight and level. Check that all corners are square - this prevents problems later when adding panels. Add the smaller support pieces (girts and purlins) to strengthen the frame. Follow the building plans exactly for adding braces that help the building resist wind and earthquake forces. Taking time to get the frame right creates a strong base for the rest of the building.
Installing Roof and Wall Panels
Put panels on carefully to keep water out and strengthen the building. Start with roof panels and make sure they overlap properly to prevent leaks. Use the right screws in the right spots to attach panels to the frame. For walls, begin at one corner and work across, fitting each panel into the grooves of the next one. Attach panels with screws, making sure they sit flat against the frame. Use special sealant on all panel joints to prevent water from entering. Check your work often to fix any gaps or loose panels right away.
Finishing Touches and Maintenance
After installation, check the entire building carefully. Look at all connections, joints, and seals for problems like rust, damage, or leaks. Tighten loose bolts and replace broken parts quickly. Make sure insulation and sealing work properly to save energy and keep the inside comfortable. Check outside surfaces regularly for rust, scratches, or dents and fix them fast to prevent bigger problems. Set up a regular care schedule that includes:
• Cleaning gutters and drains
• Checking for water pooling on the roof
• Looking for pest problems
• Inspecting seals and joints
Regular care keeps your metal building strong and working well for many years.
Related Topics:
How to Install Gutters on a Metal Building: Everything You Need to Know
Metal building contractors know that proper gutter installation protects your structure from water damage and foundation problems. This guide walks you through the complete process of installing gutters on metal buildings. You'll learn about the benefits, materials needed, system selection, installation steps, and maintenance tips. Follow these simple instructions to keep your building dry and secure for years to come.
Benefits of Installing Gutters
Installing gutters on a metal building protects the structure from water damage and stops erosion around the foundation. Gutters direct rainwater away from the building, preventing water from entering the walls or weakening the foundation. This helps keep your metal building strong over time. Gutters also stop water from sitting on the roof, which can cause leaks and expensive problems. Properly installed gutters protect the landscaping around your building by preventing soil erosion. Installing gutters is a smart investment that saves you from costly repairs later and extends the lifespan of your metal building.
Required Materials and Tools
You need specific materials and tools to install gutters on a metal building successfully. Get these materials: gutters (aluminum works best), downspouts, gutter hangers, screws, sealant, end caps, and splash blocks. You'll need the following tools: a ladder, measuring tape, chalk line, hacksaw or tin snips, drill with bits, rivet gun, level, and caulking gun. Safety equipment is important too - wear gloves, safety glasses, and use a harness. Having all these materials and tools ready makes gutter installation easier and provides better water drainage and protection.
Choosing the Right Gutter System
Selecting the right gutter system is crucial for ensuring effective installation and long-lasting performance on your metal building. Consider these key factors:
Material: Choose strong materials like aluminum, steel, or vinyl that resist rust and handle tough weather conditions
Size: Make sure gutters are big enough to handle the amount of water expected in your area to avoid overflow problems
Style: Pick a gutter style that looks good with your metal building while providing good water drainage
Considering these factors helps you select a gutter system that suits your building's needs and enhances its overall functionality.
Step-by-Step Installation Guide
Begin by gathering all the necessary tools and materials to mount gutters on your metal building. You'll need a ladder, drill, screws, gutter sections, end caps, downspouts, brackets, and sealant. First, measure the length of your roof to determine the number of gutter sections you need. Next, attach brackets to the building using your drill, ensuring they're spaced correctly for optimal support. Then, attach the gutter sections to the brackets and secure them with screws. Put end caps on the edges of the gutter sections and connect downspouts to move water away from the building. Finally, seal all joints with a waterproof sealant to prevent leaks and extend the lifespan of your gutter system.
If you’re planning to build metal carport, adding gutters during installation ensures proper drainage and protects your investment from water damage.
Maintenance Tips for Longevity
Regular maintenance keeps your gutter system on your metal building working well and lasting longer. Here are three important maintenance tips to keep your gutters in great shape:
Clean Regularly: Remove leaves, twigs, and dirt to prevent clogs and water overflow
Inspect for Damage: Check for rust, leaks, loose parts, or sagging sections regularly to fix problems quickly
Trim Tree Branches: Keep tree branches cut back to prevent them from damaging or clogging your gutters
Related Topics:

How to Find a Metal Building Contractor: Key Factors to Consider
Finding the right metal building contractor for your project requires careful planning and research. A trusted metal construction company should meet specific standards and demonstrate proven experience in the field. This guide outlines the key factors to consider when selecting a contractor. We'll look at their credentials, past work, pricing, communication approach, and customer feedback. These elements help you pick the best contractor for your metal building needs.
Contractor's Credentials
Thoroughly verify the contractor's credentials to ensure they are capable of handling your project effectively. Verify they have a valid license, insurance, and bonding. A license indicates that the contractor meets industry standards and possesses the necessary knowledge to perform the work safely and effectively. Insurance protects you in the event of accidents or damage that occur on-site. Bonding provides financial protection by guaranteeing that the project will be completed as agreed. Ask about their certifications, connections with industry groups, and any awards they've received. These demonstrate that a contractor cares about doing good work and staying up-to-date in their field. Checking credentials helps make sure your project is in good hands.
Project Experience
Review the contractor's past projects to determine if they have experience with metal buildings similar to yours. Check their history to see if they've completed similar projects. Examine the types of metal buildings they've built and inquire about any specialized skills or training they possess in metal construction. Consider how complex their past projects were and if they've handled designs with special features or tough requirements. A contractor with a diverse range of projects, demonstrating their ability to build various metal structures, will likely possess the necessary skills for your job. Good project experience shows that a contractor can deliver a successful metal building.
Pricing and Budget
Understanding the pricing and setting a budget with your metal building contractor is crucial for keeping costs under control and ensuring transparency regarding finances throughout the building process.
Request Detailed Quotes: Obtain detailed quotes that break down costs into separate components for materials, labor, permits, and any additional expenses.
Discuss Payment Terms: Clearly outline the payment schedule, deposit requirements, and any potential price adjustments.
Explore Cost-Saving Options: Inquire about energy-saving features, various materials, or innovative building methods that may help reduce costs.
Set Contingency Funds: Set aside part of the budget for unexpected problems to avoid money stress during the project
Careful consideration of pricing and budgeting matters will help make your metal building project successful and financially sound.
Communication Style
Establishing clear and effective communication with your metal building contractor is crucial for smooth coordination and project progress. When picking a contractor, ask about how they prefer to communicate-through emails, phone calls, or face-to-face meetings. Make it clear what you expect in terms of updates, timelines, and any potential changes that may occur during the project. Ensure both parties understand how frequently you'll communicate and how decisions will be made. Effective communication fosters trust, minimizes confusion, and ensures the project stays on track. By maintaining open and honest communication, you can resolve problems quickly and collaborate effectively to complete your metal building project successfully.
References and Reviews
How can you verify the reliability and quality of work of a metal building contractor before hiring them? One good way is to look at their references and reviews. Here are key things to consider:
References: Ask for and contact references from past clients to learn about the contractor's performance
Online Reviews: Check online sites like Google reviews, Yelp, or the contractor's website for feedback from previous customers
Industry Reputation: Research the contractor's reputation in the metal building industry by asking for recommendations from suppliers or other professionals
Portfolio: Look at the contractor's portfolio of past projects to judge the quality of their work and design skills
Related Topics:

How to Ground a Metal Building: Protecting Your Structure From Electrical Hazards
Proper grounding protects metal buildings from dangerous electrical problems. This guide demonstrates how to safely ground your metal structure using straightforward steps and the correct materials. We'll cover why grounding is important, what electrical dangers to be aware of, and how to install grounding systems correctly. These tips help keep your building safe from electrical damage and protect everyone inside when you hire a top metal construction company.
Importance of Grounding
Grounding provides a safe path for electrical currents to flow into the earth, protecting your metal building from electrical hazards. This process safely grounds any electrical problems or power surges, preventing them from entering your building. Good grounding prevents damage to your structure and keeps people safe from electric shock. It also maintains steady voltage levels, reduces equipment damage, and makes your electrical system safer overall. When you connect your building's electrical system to the earth properly, grounding eliminates excess electrical energy that could cause fires or damage equipment. Understanding how grounding works is crucial to maintaining the safety and optimal operation of your metal building's electrical system.
Understanding Electrical Hazards
Being aware of electrical dangers helps keep metal buildings safe and prevents accidents from occurring. Electric shock is one common risk that happens when people touch live wires or broken equipment. Overloading circuits can cause overheating and potentially lead to fires. Poor electrical maintenance, such as rusty wiring or inadequate grounding, poses significant risks to metal buildings. You should regularly inspect electrical parts, ensure insulation is functioning properly, and follow safety guidelines when working with electricity. Being aware of these dangers helps you protect your metal building and the people inside from electrical problems.
Step-by-Step Grounding Instructions
Follow these simple steps to ground your metal building's electrical system safely and correctly.
Locate the Main Electrical Panel: Find your main electrical panel where you'll connect the grounding wire.
Install Grounding Rods: Drive grounding rods into the earth near your building at the right distances and connect them to the main panel.
Connect Grounding Electrode Conductor: Attach the grounding wire securely to the grounding system so that electrical problems can flow safely into the ground.
Essential Materials for Grounding
You need specific materials to build a strong grounding system for your metal building's electrical setup. Get copper grounding rods that are 8 feet long to drive into the ground. Use grounding clamps to connect the grounding wire to the rods securely. Purchase bare stranded copper wire with the correct thickness for your building's electrical requirements. This wire runs from the grounding bus bar to the grounding rods. You need a grounding bus bar that works as the main connection point for all ground wires. You'll also need tools like a sledgehammer to drive the rods into the ground and wire cutters to handle the copper wire.
Ensuring Safety and Security
Good grounding measures must be carefully implemented to ensure the safety and security of your metal building's electrical system. Ensuring your building's electrical system is properly grounded prevents dangers such as electrical shocks and fires. Here are three important steps to make your metal building safer:
Check and maintain grounding rods and connections regularly to ensure they're solid and free from rust.
Use surge protection devices to protect your electrical equipment from power surges and lightning strikes.
Install ground fault circuit interrupters (GFCIs) in areas prone to moisture, such as bathrooms and kitchens, to prevent electrical accidents.
Related Topics:

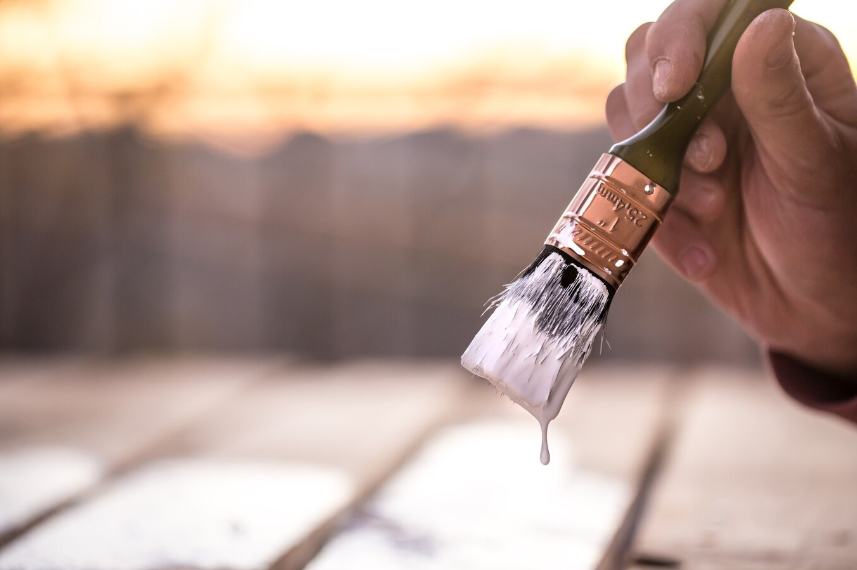
How to Paint a Metal Building: Choosing the Right Paint for Maximum Durability
Painting a metal building requires careful planning and the use of the right materials to ensure long-lasting results. This guide walks you through everything you need to know about selecting paint for metal structures. Leading metal construction projects demand durable paint systems that can withstand harsh weather conditions and protect against rust. From selecting the right type of paint to proper application techniques, we'll cover all the steps necessary for a successful painting project that'll protect your building for years to come.
Importance of Paint Selection
Choosing the right paint is crucial for getting maximum protection and long-lasting results on your metal building. Whether you’re painting agricultural structures, storage units or metal garage buildings, the right paint ensures durability against weather and daily use. For the best results, choose high-quality paint specifically designed for metal surfaces, as these paints often include rust-resistant features. Priming the metal surface before painting helps the paint stick better and last longer. Learn about different paint types, such as acrylic, epoxy, or polyurethane, to select the best one for your project. By carefully considering these factors and selecting the right paint, you can achieve a strong finish that will last for many years.
Factors to Consider
Several important factors influence the choice of paint for maximum durability on metal buildings. First, check the weather conditions your building will face, including temperature changes, moisture levels, and sun exposure. Second, consider the type of metal you're painting, as different metals require specific primers and coatings for proper adhesion and protection. Third, consider the size and location of your building to determine the best method for applying the paint—spray, brush, or roller—to achieve even coverage and lasting results. Finally, consider the appearance you want and how well the color should hold up to choose paint that both protects and enhances the look of your metal building.
Types of Paint Finishes
Knowing about different paint finishes helps you get both durability and good looks on metal buildings. When painting your metal building, you have several choices, each with different qualities:
• High-gloss finishes - Give a shiny look but show flaws more easily
• Semi-gloss finishes - Balance shine with hiding small imperfections
• Satin finishes - Have a soft sheen and hide flaws well
• Flat finishes - Have no shine and hide surface problems best, but may not last as long as shinier options
Select the right finish based on how you want your building to appear and the level of durability required for the paint.
Preparation and Application Tips
Good preparation and application are crucial to ensuring your chosen paint finish lasts as long as possible on metal buildings. Start by thoroughly cleaning the metal surface to remove dirt, grease, and rust that could prevent the paint from adhering properly. Ensure the surface is completely dry before applying a primer designed for metal surfaces. This primer helps the paint stick better and prevents rust. When applying paint, use a good brush, roller, or sprayer to get even coverage. Follow the maker's directions for drying times and the number of coats required. Pay attention to the weather, like temperature and humidity, to help the paint cure properly.
Maintenance for Longevity
Regular care plays a significant role in ensuring your painted metal surfaces last a long time and remain durable. Check your building regularly to spot any wear, rust, or damage early. Clean the metal building with mild soap and water at least twice a year to remove dirt and pollutants that can damage the paint over time. Repair any chipped or scratched areas immediately by touching them up with paint to prevent rust from spreading. Plan to repaint every 5-10 years, depending on the type of paint and weather conditions. Following these maintenance steps will significantly extend the life of your metal building's paint and protect it from premature failure.
Related Topics:

How to Paint a Metal Shed: Preparing and Protecting Your Shed Properly
Painting a metal shed the right way not only protects it from rust and weather damage but also enhances its appearance. Any metal construction company will tell you that proper preparation and technique are key to a lasting paint job. This guide walks you through each step, from inspecting your shed's condition to maintaining it over time. We'll cover surface preparation, choosing the right materials, painting methods, and ongoing care. These simple steps help you get professional results that last for years.

Assessing the Condition of Your Shed
Inspect your metal shed carefully before you begin painting. Check the entire surface for rust, peeling paint, or any damage that requires repair first. Pay special attention to corners, seams, and edges, where rust is most likely to start. Use a wire brush or sandpaper to scrape off loose paint and rust until the surface feels smooth. For deep rust spots, use a rust converter to prevent further damage. Look for holes or dents that need patching before you paint. Taking the time to inspect your shed's condition carefully leads to better, longer-lasting results.
Cleaning and Preparing the Surface
Clean your shed thoroughly to remove all dirt, grime, and debris before painting. Start by sweeping the outside with a broom to remove loose dirt and spider webs. For tough stains, use a pressure washer to clean the metal surface thoroughly. Remove rust with a wire brush or sandpaper until the metal feels smooth. Scrub the shed with water and mild soap to remove any leftover grease or oil. Rinse everything thoroughly and let it dry completely before proceeding to the next step. A clean, properly prepared surface helps paint stick better and last longer.
Choosing the Right Paint and Primer
Select the right paint and primer to achieve optimal results that protect your metal shed from the elements. Follow these steps to choose the best products:
Primer: Use a high-quality metal primer made for outdoor use
Paint Type: Choose paint designed for metal surfaces to ensure it sticks well and lasts long
Finish: Pick a finish (like satin, semi-gloss, or gloss) based on how you want it to look and how much upkeep you want
UV Protection: Look for paints with UV protection to prevent fading and keep your shed looking good
Applying the Paint With Proper Technique
Use the right painting method to get a smooth, long-lasting finish on your metal shed. Start with a good paintbrush or paint sprayer for even coverage. Begin at the top of the shed and work your way down, using overlapping strokes to avoid drips. Apply thin coats of paint instead of one thick coat to prevent runs and drips. Allow each coat to dry completely before applying the next one. Check the weather to make sure you're painting on a dry day with mild temperatures. Clean your painting tools thoroughly with paint thinner or water (depending on the type of paint) to keep them functioning properly for future projects.
Maintaining and Extending the Life of Your Shed
Keep your newly painted metal shed in good shape with regular maintenance that protects against rust and weather damage. Follow these steps to maintain and extend your shed's life:
Regular Cleaning: Wash your shed with mild soap and water to remove dirt and grime
Inspect for Damage: Check for scratches or chipped paint often and fix them quickly
Reapply Protective Coating: Every few years, add a new coat of paint or rust-resistant sealer
Trim Vegetation: Keep plants around the shed trimmed to prevent moisture buildup and damage
Related Topics:

How to Insulate a Metal Garage: Best Materials and Methods
Insulating your metal garage makes it comfortable year-round and helps control energy costs. The right insulation keeps your space warm in winter and cool in summer, protecting stored items from temperature swings. Whether you're working on a simple storage building or planning a larger project, proper insulation makes all the difference. A metal carport in Dallas, or similar structures, benefits greatly from good insulation when you want to enclose and utilize the space effectively. This guide walks you through choosing materials, preparing your space, and installing insulation that will last for years.

Choosing the Right Insulation Materials
Several insulation types are suitable for use in a metal garage building, each with its unique strengths. Fiberglass insulation costs less than other options and provides good temperature control, coming in batts or rolls that fit easily between metal studs and ceiling joists for straightforward installation. Foam board insulation gives you strong thermal protection and resists moisture better than fiberglass, attaching directly to metal surfaces using adhesive or screws. Reflective insulation utilizes foil-faced materials to reflect heat away from your garage, which is particularly effective in hot climates where keeping heat out is most crucial. Spray foam insulation seals every crack and gap, providing strong temperature control. Although it may be more expensive than other options, it creates an airtight barrier that completely stops drafts. Consider factors such as your budget, local weather, and the level of temperature control required when selecting the right material for your project.
Preparing the Metal Garage
Clean all surfaces thoroughly before installing any insulation by sweeping and vacuuming to remove loose dirt. Then, use a degreaser to remove oil stains and grease spots that could interfere with adhesion. For stubborn grime, pressure washing the walls gives you the cleanest surface possible. Walk through your garage and look for holes, rust spots, or damaged areas that need fixing first. Patch holes with metal repair paste and treat rust with primer to prevent it from spreading. Check for water leaks around windows, doors, or roof seams, as moisture problems can damage your insulation over time. Inspect electrical outlets, light fixtures, and any pipes or wires that pass through walls, noting their locations, as you'll need to work around these obstacles when cutting insulation. Taking the time to prepare everything correctly makes the installation go much smoother.
Installing Insulation: Step-by-Step Guide
Start by measuring each wall section and ceiling area where insulation will be installed, cutting your insulation material to fit these spaces accurately, and leaving about 1/4 inch extra to ensure a snug fit. Use a sharp utility knife for clean cuts that won't leave messy edges. Begin the installation on one wall and work your way around the garage systematically, starting at the bottom for wall insulation and working up. Fit pieces tightly between studs without compressing the material, as compressed insulation doesn't work as well. When insulating the ceiling, measure the distance between the roof trusses and cut pieces to fit snugly in each bay. Install the ceiling insulation by pushing it up between the trusses and securing it with staples or wire supports. Wear gloves, long sleeves, and safety glasses during installation to protect yourself from fiberglass particles.
Sealing Gaps and Air Leaks
Finding and sealing air leaks makes your insulation work much more effectively, so walk around your garage with a flashlight and inspect windows, doors, electrical outlets, and any areas where pipes or wires enter the building. Even small gaps allow a significant amount of air to pass through, wasting energy. Use caulk to seal small cracks and gaps around windows and door frames. For larger openings, expanding foam insulation is more effective because it fills irregular spaces more efficiently. Pay special attention to seams where metal panels meet, as these spots often have small gaps that can add up to significant air leaks. Check around electrical outlets and light switches, as these are commonly found to have gaps behind them. Remove the cover plates and use foam gaskets or caulk to seal around the electrical boxes. Don't forget to inspect the garage door and add weatherstripping around the edges to prevent drafts and help maintain temperature control.
Maintaining Insulation Effectiveness
Regular maintenance ensures your insulation continues to function properly for years. Check it every few months to confirm it's still in good condition and performing its intended function. Here's what to watch for:
Inspect for any damage, compression, or wet spots that may compromise insulation performance.
Replace damaged sections right away to prevent heat transfer and maintain temperature control.
Add weatherstripping around doors and windows to improve sealing and stop air leaks.
Consider installing reflective radiant barriers to boost insulation performance by blocking heat transfer through radiation.
Keep an eye on your energy bills, too, as heating or cooling costs that start to rise may indicate that your insulation needs attention or that new air leaks have developed.
Related Topics:

How to Build a Metal Shed: Planning, Preparation, and Construction
Building your metal sheds can save money and provide you with exactly the storage space you need. Finding the best metal garage or shed design starts with understanding your specific requirements and the construction process involved. This guide covers everything from selecting the right spot to installing the final roof panel, helping you create a sturdy structure that will last for years to come.

Choosing the Right Location
Choosing the right location for your metal shed has a significant impact on its performance and longevity. Start by looking for ground that's as flat as possible - this makes installation easier and keeps your shed stable over time. Walk around your property and inspect for slopes, dips, or uneven areas that require leveling.
Consider how close you want utilities like electricity and water to be. If you plan to use power tools in your shed or need running water, being near existing lines can save you money on installation costs. Also, pay attention to how much sun different areas get throughout the day. A spot with good sunlight helps prevent moisture problems and provides natural light for working. Areas that remain damp or shady can lead to rust and mold issues in the future.
Designing Your Shed Layout
Planning your shed's interior layout before you build saves time and makes the space more useful. Start by deciding what you'll store - tools, lawn equipment, seasonal items, or a mix of everything. This helps you determine how much space each area requires and where to place different zones.
Draw a simple floor plan showing where you want workbenches, shelving, and storage areas. Leave enough room to walk between these areas comfortably - cramped spaces make it hard to get things in and out. Consider adding windows or skylights for natural light and fresh air. Good ventilation prevents moisture buildup, making the space more pleasant to work in. Mark spots for electrical outlets if you plan to add power later.
Gathering Materials and Tools
Having all your materials and tools ready before you start ensures the project moves smoothly. Your metal shed kit should include all the panels, doors, trim pieces, and hardware needed for assembly. Check the parts list carefully to ensure everything matches your shed's size and design.
You'll need basic tools, such as a cordless drill, screwdrivers, a hammer, a level, and a tape measure, for most of the work. Safety gear, including gloves and safety glasses, protects you from sharp metal edges. A metal-cutting saw may be necessary if you need to trim panels to fit the desired dimensions. Set up a clean workspace where you can organize all the parts and tools within easy reach. Double-check that all components are in good shape and nothing is missing before you begin building.
Preparing the Foundation
A solid foundation keeps your shed level and prevents problems later. Clear the building area of grass, weeds, rocks, and any other debris. Use a shovel and rake to make the ground as flat and firm as possible. Loose or uneven soil can cause your shed to shift or settle unevenly.
Mark the shed's outline using stakes and string to indicate exactly where the foundation will be placed. For a simple approach, dig out the area and lay down a gravel base that's level and well-packed. If you want something more permanent, dig a shallow trench and pour a concrete pad. Use a level frequently during this process to ensure everything is level. A good foundation makes the rest of the construction much easier and provides a shed that will remain square and stable.
Assembling and Erecting the Shed
Start by unpacking all the shed components and organizing them according to the instruction manual. Lay everything out in a logical order so you can easily locate parts as you work. Most metal sheds are designed to assemble in a specific sequence, so follow the steps in order rather than jumping around.
Begin with the base frame, ensuring all connections are tight and the frame is perfectly square. Attach the wall panels to the frame one at a time, ensuring each panel is straight and level before proceeding to the next. Take your time with the roof structure, as it carries the most weight and needs to be secure.
Install roof panels carefully, overlapping them properly to prevent water from entering. Add doors and any accessories, such as vents or windows, according to the manufacturer's instructions. Go back through and tighten all bolts and screws to ensure everything is secure. A well-assembled shed will serve you reliably for many years with minimal maintenance.
Related Topics:

How to Build a Metal Building: Planning and Construction Tips
Building a metal structure requires careful planning and smart decisions from start to finish. Whether you're working on commercial projects or other types of construction, success depends on getting the basics right before you break ground. Residential metal garages and similar structures need the same attention to detail as larger buildings. This guide walks you through the key steps that make the difference between a smooth project and costly headaches down the road.

Choosing the Right Location
Selecting the right location for your metal building begins with assessing drainage and ground stability. Water problems can cause the biggest headaches later, so ensure your site slopes away from where the building will be situated. This prevents rainwater from pooling around your foundation.
The ground underneath needs to support your building's weight without shifting or settling. Different soil types handle loads differently - clay soil moves more than sandy soil, and rocky ground stays put better than soft dirt. Getting a soil test done early allows you to determine the type of foundation required and prevents surprises during construction.
Look for level ground whenever possible, as grading costs can add up quickly. Also, verify that utilities such as power, water, and sewer lines can reach your site without incurring major expenses.
Selecting the Ideal Materials
Choosing the right materials has a significant impact on the lifespan of your building and its associated maintenance costs. Steel works well for the mainframe because it's strong, lightweight, and better handles weather than other options. Look for galvanized steel that resists rust, especially in areas with high humidity or salt air.
For walls and roofing, you can pick from steel panels, aluminum sheets, or insulated metal panels. Steel panels are less expensive, but aluminum is resistant to rust. Insulated panels may cost more upfront, but they ultimately save money on heating and cooling costs.
Don't cheap out on fasteners - use screws and bolts that won't rust over time. Stainless steel or coated fasteners cost more, but they prevent problems that occur when cheap hardware corrodes and fails.
Understanding Building Codes
Building codes exist to ensure that structures are safe and comply with legal requirements. You need to know what rules apply to your project before you start designing. Here's what matters most:
Structural Requirements: Your building frame must be able to withstand wind, snow, and earthquake loads specific to your area.
Fire Safety Standards: Utilize fire-resistant materials and ensure the presence of proper exits, taking into account the building's size and intended use.
Accessibility Guidelines: Include ramps, wide doorways, and accessible bathrooms if required.
Energy Efficiency Regulations: Meet insulation and window standards to reduce energy waste.
Code requirements change based on your building's size, use, and location. Commercial buildings are subject to stricter regulations than residential ones, and certain areas have additional requirements for hurricanes or earthquakes.
Securing Necessary Permits
Obtaining permits before starting construction helps you avoid legal issues and prevents work stoppages. Most projects require a building permit that demonstrates your plans comply with local codes. Zoning permits confirm your building type is allowed in that location.
Begin the permit process early, as approval can take weeks or months. Submit complete plans with structural drawings, electrical layouts, and plumbing details. Missing information can slow down approval and delay your project.
Some areas require special permits for electrical work, plumbing, or septic systems. Verify with your local building department to ensure you have all necessary approvals before commencing work.
Scheduling Construction Timeline
A good timeline keeps your project moving and helps you coordinate different trades. Break your project into clear phases that build on each other:
Site Preparation: Clear the land, level the ground, and bring in utilities.
Foundation Construction: Pour concrete footings and foundation walls.
Erection of Structural Framework: Put up columns, beams, and roof trusses.
Interior Finishing: Add insulation, electrical systems, plumbing, and interior walls.
Plan for weather delays and material delivery times to ensure smooth operations. Order long-lead items, such as custom steel, early to avoid holding up the entire job. Schedule inspections at the right times so work doesn't stop waiting for approval to continue.
Related Topics:

How to Insulate a Metal Building: DIY Insulation Methods Explained
Metal garage buildings and other steel structures require proper insulation to remain comfortable year-round and reduce energy costs. This guide covers everything you need to know about insulating your metal building yourself, from choosing the right materials to sealing up every gap. We'll walk through each step so you can create a warmer, more efficient space without hiring professionals.
Types of Insulation Materials
Several insulation types are suitable for metal buildings, each offering distinct benefits. Fiberglass insulation costs less and performs well in most situations. It comes in batts or rolls that fit easily between metal studs or support beams.
Spray foam insulation seals air gaps better than other options and resists moisture. It expands to fill every crack and corner, creating a solid barrier against heat transfer. Reflective insulation utilizes foil-faced materials to reflect heat away from your building, which is particularly effective in hot climates.
Rigid foam boards, such as expanded polystyrene, provide high insulation value in thin layers. These boards are ideal when you require strong insulation but have limited space to work with.
Calculating Insulation Needs
Determine the amount of insulation needed by measuring all the surfaces you plan to insulate. Measure the length, width, and height of each wall, as well as the ceiling area. Break complex shapes into simple rectangles to make measuring easier.
Don't forget to subtract space taken up by doors, windows, and other openings. Check what R-value your local climate requires - this tells you how thick your insulation needs to be. Different materials have different R-values per inch, so some require thicker materials than others to achieve the same insulation effect.
Preparing the Metal Building
Clean all surfaces thoroughly before installing insulation. Sweep, vacuum or pressure wash to remove dirt, dust, and debris that could interfere with installation. Inspect the metal panels for rust spots, dents, or holes that require repair before installing insulation.
Seal any gaps, cracks, or holes with high-quality sealant to prevent air from seeping through. Check for moisture problems that could cause mold or reduce the effectiveness of your insulation. Set up proper ventilation if the space feels damp or humid. Taking the time to prepare everything correctly makes the rest of the job go smoothly.
Installing Insulation Properly
Start in one corner and work your way across the space systematically. Lay out your insulation material so it covers everything evenly without leaving gaps. Use screws or staples to hold the insulation securely in place.
Ensure the insulation fits snugly, but avoid compressing it too much - compressed insulation doesn't work as effectively. Pay special attention to seams and joints where pieces meet. Seal these spots tightly to prevent heat from escaping.
Use a sharp utility knife to cut around pipes, electrical wiring, and other obstacles. Check your work as you go to ensure every area is covered properly.
Sealing Air Leaks and Gaps
Sealing air leaks improves the effectiveness of your insulation and reduces energy consumption. Here's how to do it right:
Identify Leaks: Walk through your building and look for gaps, cracks, or openings that allow air to pass through.
Use Sealants: Apply high-quality sealants specifically designed for metal surfaces around windows, doors, vents, and anywhere pipes or wires pass through walls.
Weatherstripping: Put weatherstripping around doors and windows to stop air from leaking in and out.
Insulation Board: Use insulation boards to cover bigger gaps or openings in your metal building's frame for extra protection against drafts.
Related Topics:

How to Insulate a Metal Shed: DIY Tips for Beginners
Insulating your metal shed is a smart way to control the temperature year-round and protect your stored items from extreme weather conditions. Whether you're considering metal construction in Dallas or elsewhere, proper insulation makes your shed more comfortable and energy-efficient. This guide walks you through the complete process, from picking the right materials to finishing touches that seal out drafts.

Choosing the Right Insulation Material
Picking the right insulation makes all the difference in how well your shed performs. Fiberglass insulation is a suitable choice for most people because it is cost-effective and effectively controls temperature. Spray foam insulation covers every nook and cranny, sealing gaps that other materials might miss, though it costs more upfront.
Reflective foil insulation prevents heat from bouncing around inside your shed and is easy to install. Rigid foam boards provide strong insulation and don't absorb water like some other options. Consider your budget, local weather conditions, and the intended use of the shed when making your decision. If you’re planning to upgrade or insulate custom metal sheds, investing in the right material from the start ensures better comfort and long-term durability.
Preparing the Metal Shed for Insulation
Before installing insulation, carefully inspect your shed's walls and ceiling. Look for rust spots, holes, or gaps in the metal that could allow air or water to seep through. Fix any holes you find with metal patches and use good sealant to close up gaps.
Check for wet spots as well - moisture causes mold and reduces the effectiveness of insulation. If your shed feels damp inside, set up proper airflow to keep it dry. A well-prepared shed gives your insulation the best chance to work right.
Installing Insulation in the Walls
Start by measuring the space between your wall studs, then cut your insulation to fit snugly in those spaces. Use staples to hold the insulation in place, ensuring that you cover the entire wall without compressing the material. Squashed insulation doesn't work as well.
You can add reflective foil insulation on top of fiberglass or foam boards for extra protection. Use tape to seal any gaps or seams - even small openings let air through and waste energy. Keep your insulation layer smooth and continuous for the best results. Install a vapor barrier over everything to prevent moisture from accumulating.
Insulating the Roof of the Shed
Measure the distance between your roof beams first, then cut your insulation to fit those spaces exactly. Use a sharp utility knife for clean cuts that fit snugly without leaving gaps. Push the insulation gently up between the beams - don't compress it too much, or it won't insulate properly.
Hold everything in place with staples or special insulation adhesive. Pay extra attention to vents, skylights, or any roof openings where heat escapes easily. Good roof insulation makes a huge difference in keeping your shed comfortable.
Sealing Gaps and Air Leaks for Efficiency
The final step involves finding and sealing every gap through which air can escape. Check around windows, doors, vents, and where walls meet the floor. Use caulk or weatherstripping for smaller gaps and expanding foam for bigger holes.
Don't forget spots where pipes or electrical wires go through walls - these are often overlooked but let lots of air through. Look at the seams between metal panels and seal any openings you find. Taking the time to seal everything properly makes your insulation work more effectively and keeps your energy costs down.
Related Topics: